So I like making things. Jewelry, costume parts, scarves and ornaments, all kinds of things. My newest project is a pair of galaxy shoes. The picture below is an example of a beautiful pair from an Etsy shop.
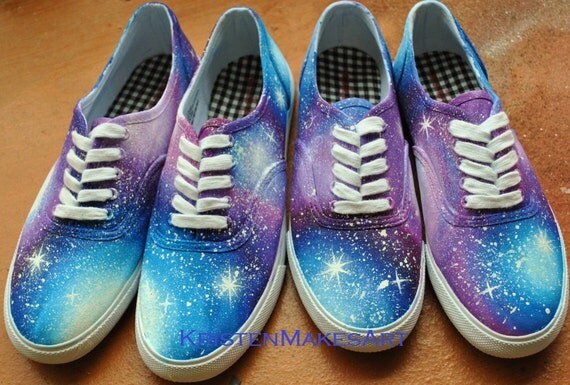
Photo courtesy of Kristen S. https://www.etsy.com/shop/KristenMakesArt?ref=l2-shopheader-name
There are a lot of tutorials on the web, and I decided I wanted to make a pair. I followed a wonderful youtube video that you should probably just watch instead of reading this post, but you're a nice person and you'll finish reading instead right?
First I got a cheap white pair of canvas tennis shoes from Amazon. Looking back they worked well but it was kind of stupid to get white ones. I wanted to start my galaxy shoes with a black background because, well, space, so next time I'll skip the extra step and buy black tennis shoes.
Next I bought fabric paint, brand name Scribbles from Hobby Lobby.

You can buy these from Amazon but they are five dollars a bottle, at Hobby Lobby they are $1.29 a bottle, so I recommend trying to find them in a craft store. My only problem with them is that the dried paint is very grainy and stiff. I probably wouldn't use them on shirts or clothes I like to be bendy. The end result stays very well. I've colored two pairs of shoes with them, and worn a pair for several months at work and the color hasn't chipped or faded. Good stuff.
Besides shoes and fabric paint, the other items you need are as follows:
A sponge brush
Masking tape
A toothbrush
Newspaper
Nasty cup for rinsing out your sponges
a paperclip, pencil, or other small pointy object
Okay, time to actually get started. Lay out some newspaper to prevent painting goo from going everywhere, and then put masking tape securely around the sole of the shoe. The photo below is not mine because I did not have the foresight to take a good picture of the shoes taped.

Photo courtesy of http://www.sparklecollective.com/galaxy-painted-converse/
Next cover that entire freaking shoe with black fabric paint. I squeezed the paint onto a paper plate and then scooped it up on a sponge brush, but by the end I was just applying the paint directly to the sponge. You're going to apply a lot of pressure to some parts of the shoe to get all of it black, and remember to apply paint to the creases around the tape. Also don't forget the tongue of the shoe. Chances are you'll get black paint on the inside of the shoe, but don't sweat it, your foot will cover that up. I left my shoes for about a day after painting them black, but I would imagine they'd be ready in about 1 to 2 hours. The paint dries quick.

Once dried, select the color you'd like to start with. I started with purple. I wanted to use every single color I had. I wanted the toes of the shoes to be especially vibrant, so I painted roughly half the toe in purple, spreading the color around so that it wasn't too thick and brushing around the edges until they were soft, not hard lines. I found working in a kind of circular motion worked best, but anything that colored the shoe was successful in my book.
After purple I painted the rest of the toe in green. While painting leave the edges kind of ragged and cloudy, and when painting in a new color overlap the edges so that the two colors go smoothly into one another. I found leaving the new paint for about ten minutes made them dry enough to paint with a new color.
Something else you want to keep in mind is which colors go together, and which are complementary, that is, which colors mix to become brown or gray. I didn't know which colors were complementary until I took an art class, so here is a helpful color wheel if you are also unfamiliar.

Photo courtesy of http://www.apartmenttherapy.com/color-theory-101-making-complementary-colors-work-for-you-179143
If you look at any color on this wheel, and mix it with the color directly opposite to it, you will get a brown or gray color. Red is complementary to green, blue is complementary to orange, and so on. So with my purple paint, I could easily use a blue, red, or green color next, but I didn't want to use yellow.
My end result starting from the original purple and going around the shoe was purple, red, yellow, green, purple. I colored the toe in blue as well. This particular blue, called a "crystal gel" didn't add a blue color so much as a sheen and a lot of blue sparkles, which I thought were suitably spacelike.
Once that was done I had the baseline, and then I applied some white very lightly in an oval pattern on the toe of the shoe and near the heel to make a galaxy. Make sure to rough the edges of the white out.
Then came the toothbrush. The youtube video I linked to above shows the toothbrush spewing white paint in beautiful flecks across the shoe. I don't know how she did that, I imagine she must have used different paint, or I'm just incompetent, but I couldn't make mine do that. I recommend using the toothbrush anyway though, because once you apply the white paint to the toothbrush and scrape your thumb violently across the bristles, you'll find it does spray some tiny flecks. Not a lot, but enough to make shoe look a little more randomized, like space.
For the big flecks I dipped an unfolded paperclip in white paint and stabbed my shoe at random all over. Remember to add some dots in clusters in some areas, especially the areas of white that are supposed to be galaxies. Here is the finished product.

I find them quite beautiful, and if I make more I might try making the base color red or blue instead of black. Hopefully this will be helpful to someone, and if you have any questions please don't hesitate to ask.
Photo courtesy of Kristen S. https://www.etsy.com/shop/KristenMakesArt?ref=l2-shopheader-name
There are a lot of tutorials on the web, and I decided I wanted to make a pair. I followed a wonderful youtube video that you should probably just watch instead of reading this post, but you're a nice person and you'll finish reading instead right?
First I got a cheap white pair of canvas tennis shoes from Amazon. Looking back they worked well but it was kind of stupid to get white ones. I wanted to start my galaxy shoes with a black background because, well, space, so next time I'll skip the extra step and buy black tennis shoes.
Next I bought fabric paint, brand name Scribbles from Hobby Lobby.

You can buy these from Amazon but they are five dollars a bottle, at Hobby Lobby they are $1.29 a bottle, so I recommend trying to find them in a craft store. My only problem with them is that the dried paint is very grainy and stiff. I probably wouldn't use them on shirts or clothes I like to be bendy. The end result stays very well. I've colored two pairs of shoes with them, and worn a pair for several months at work and the color hasn't chipped or faded. Good stuff.
Besides shoes and fabric paint, the other items you need are as follows:
A sponge brush
Masking tape
A toothbrush
Newspaper
Nasty cup for rinsing out your sponges
a paperclip, pencil, or other small pointy object
Okay, time to actually get started. Lay out some newspaper to prevent painting goo from going everywhere, and then put masking tape securely around the sole of the shoe. The photo below is not mine because I did not have the foresight to take a good picture of the shoes taped.
Photo courtesy of http://www.sparklecollective.com/galaxy-painted-converse/
Next cover that entire freaking shoe with black fabric paint. I squeezed the paint onto a paper plate and then scooped it up on a sponge brush, but by the end I was just applying the paint directly to the sponge. You're going to apply a lot of pressure to some parts of the shoe to get all of it black, and remember to apply paint to the creases around the tape. Also don't forget the tongue of the shoe. Chances are you'll get black paint on the inside of the shoe, but don't sweat it, your foot will cover that up. I left my shoes for about a day after painting them black, but I would imagine they'd be ready in about 1 to 2 hours. The paint dries quick.

Once dried, select the color you'd like to start with. I started with purple. I wanted to use every single color I had. I wanted the toes of the shoes to be especially vibrant, so I painted roughly half the toe in purple, spreading the color around so that it wasn't too thick and brushing around the edges until they were soft, not hard lines. I found working in a kind of circular motion worked best, but anything that colored the shoe was successful in my book.
After purple I painted the rest of the toe in green. While painting leave the edges kind of ragged and cloudy, and when painting in a new color overlap the edges so that the two colors go smoothly into one another. I found leaving the new paint for about ten minutes made them dry enough to paint with a new color.
Something else you want to keep in mind is which colors go together, and which are complementary, that is, which colors mix to become brown or gray. I didn't know which colors were complementary until I took an art class, so here is a helpful color wheel if you are also unfamiliar.
Photo courtesy of http://www.apartmenttherapy.com/color-theory-101-making-complementary-colors-work-for-you-179143
If you look at any color on this wheel, and mix it with the color directly opposite to it, you will get a brown or gray color. Red is complementary to green, blue is complementary to orange, and so on. So with my purple paint, I could easily use a blue, red, or green color next, but I didn't want to use yellow.
My end result starting from the original purple and going around the shoe was purple, red, yellow, green, purple. I colored the toe in blue as well. This particular blue, called a "crystal gel" didn't add a blue color so much as a sheen and a lot of blue sparkles, which I thought were suitably spacelike.
Once that was done I had the baseline, and then I applied some white very lightly in an oval pattern on the toe of the shoe and near the heel to make a galaxy. Make sure to rough the edges of the white out.
Then came the toothbrush. The youtube video I linked to above shows the toothbrush spewing white paint in beautiful flecks across the shoe. I don't know how she did that, I imagine she must have used different paint, or I'm just incompetent, but I couldn't make mine do that. I recommend using the toothbrush anyway though, because once you apply the white paint to the toothbrush and scrape your thumb violently across the bristles, you'll find it does spray some tiny flecks. Not a lot, but enough to make shoe look a little more randomized, like space.
For the big flecks I dipped an unfolded paperclip in white paint and stabbed my shoe at random all over. Remember to add some dots in clusters in some areas, especially the areas of white that are supposed to be galaxies. Here is the finished product.

No comments:
Post a Comment